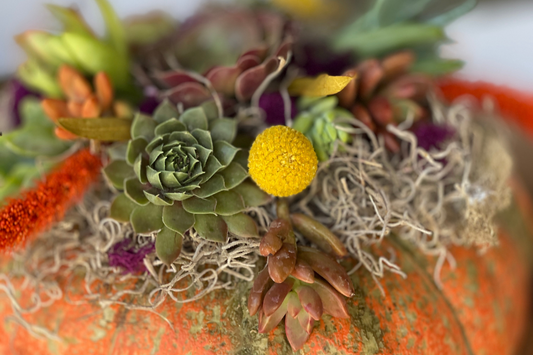
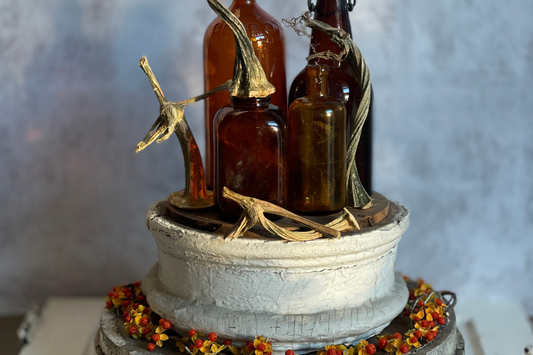
Autumn brings two of my favorites into the spotlight—succulents and pumpkins! Combining them in this creative DIY project is such a fun way to celebrate the season and add a touch of natural charm to your home.
I’ve put together a step-by-step guide to help you create your own stunning Succulent Pumpkin this Fall.
If you’d love to learn in person, I’ll be teaching two hands-on workshops at Cedar Ridge Trails in Miamisburg, OH:
📅 Saturday, Sept. 27 at 2 PM
📅 Saturday, Oct. 5 at 2 PM
✨Let's Get Started!
Materials:
- Heirloom Pumpkin
- Handful of Moss
- Succulent Cuttings
- Dried flowers, berries and foraged items.
- Tacky Glue
- Wooden Skewer, Popsicle Stick or Chopstick
Choosing your Pumpkin:
Begin by choosing a fresh pumpkin without any soft spots or gashes. Any variety of pumpkin can be used. I prefer the heirloom style because of the shape and size. These pumpkins come in a wide variety of colors, such a light peach, green, blue, white and variegated. Heirloom pumpkins work well for this project because most have a flat top or one that tapers down towards the stem. This forms an ideal area to “plant” the succulents.
You can also use a traditional medium size orange or white pumpkin if you prefer. Small orange pie pumpkins and mini white and orange pumpkins work well for this project too. The flatter the top around the stem, the better the succulents will stay in place.


Pumpkin Prep:
First step is to clean your pumpkin with bleach and water. This is an important step to help make the pumpkin last longer.
Succulents:
Let’s take a moment to discuss what type of succulents to use in your project. Succulent cuttings work really well for this project. I typically use about 12 succulent cuttings in a variety of size and species. A cutting is a piece of a succulent that has been cut from the main plant. Cuttings are nice to use because they are easy to attach and secure. They are also less messy than having to deal with rooted succulents. Cuttings can be more economical to purchase and can even be taken from a succulent you have at home. Hens and Chicks or Sempervivum is a common type of succulent you may even have in your garden. They are fast growers and spread out in the form of a rosette cluster. Those rosettes can be plucked from the ground and used for your project. Succulent cuttings can be purchased from growers online and come in an array of colors and species.


Type of Moss:
Moss is used as a base to secure the succulents. The succulents can root into the moss and be transplanted into a pot at a later date. There are several types of moss available in local stores and online. Spanish moss, sphagnum moss, preserved moss all work well with this project. Choose a moss that is accessible and one that has a color you like.
Other Supplies:
A spray adhesive works well to secure your moss to the pumpkin. It sets in quickly and will let you get started right away with attaching the succulents. Just spray the top of the pumpkin around the stem, where you want the moss to be. Use caution not to get spray adhesive all over the pumpkin as everything sticks to it and it can get messy looking.
Tacky glue works well to secure the succulents. A wooden skewer is a good tool to help hold your succulent down while setting into place. You can also use a popsicle stick, or chopstick.


Dried Naturals:
If you like the look, you can use dried flowers, grasses, seed pods and berries in your arrangement. Fall is a great time of year to find these items in your yard, or along the roadside. They add texture and create visual interest. Some of my favorites: Tallow Berries, bittersweet, feathers, miniature Indian corn & husks, craspedia aka billy buttons, pussy willows, bunny tails, cat tails, seed pods, burrs, artemisia and strawflower.


It's time to Create!
Once you have sourced your succulents and moss, it’s time to get started.
Spray the adhesive on the top of the pumpkin where you intend to secure your moss. Use a good coating and press your moss into place around your stem. The Stem can be left in place or removed. It is your preference.
Once the moss is in place it’s time to attach the succulents. You may want to lay the succulent cuttings on top of the moss to get an idea of your overall design before you begin to adhere them.
When you are ready, add some glue directly onto the side of the stem of the succulent cutting and nestle down into the moss. Use the wooden stick to help position the succulents in place. Fingers can be too big and can inadvertently knock off the leaves of the succulent. If possible, avoid applying glue directly to where the stem was cut from the plant.
Work your way around the pumpkin, adding the succulent cuttings into your desired arrangement. Keep in mind if you want to add in any dried naturals, tuck those in as you go, use glue and hide the stems in the moss. Rotate the pumpkin around and check out the different sides to make sure you like how it looks all the way around. The glue will dry and succulents will be secure in approximately 12 hours.


Displaying your Pumpkin Centerpiece:
Your succulent topped pumpkin is now ready for display! Use indoors as a centerpiece on dining table, in your entryway or in a nook on a bookshelf. You can also set outdoors on a covered porch or patio. If you plan to keep the pumpkin outdoors, it is a good idea set it on top of a piece of wood or cardboard rather than sitting directly on concrete as cement will cause it to decay faster.
Care:
With proper care, the succulent topped pumpkin can last for several weeks!
- Place your pumpkin indoors so it receives bright indirect light. You can also place it outside where it gets morning sun when temps are at least 70 degrees.
- Avoid the afternoon hot sun, it will burn your plants.
- Spray the succulents at the base with water once a week.
Once the succulents have roots and outgrown the pumpkin you can transplant the succulents into soil. They will continue to grow!


Whether you follow this guide at home or join me at one of the workshops, I hope creating a Succulent Pumpkin brings you as much joy as it does me. It’s a simple, beautiful way to celebrate the season and let your creativity shine.


